| Par | 4 | Distance | 202m | 663ft |
Blue tee: ///stars.stuff.desk
Red tee: ///object.bath.loss
Basket: ///units.moons.faster
- LJ Little Juan
- Swa Swallows
- TCA Tin Can Alley
- HP Hard Par
- Hmp The Hump
- HB Humpback
- Smk Church Wood
- Crw Crow’s Nest
- Lst Safari 1 – Lost Sole
- Oak Over The Oak
- DPD Deer Park Drop
- P5 The Par 5
- HR High Riser
- $2 Safari 2
- Pnd The Pond
- WS Whale Sac
- MP Muster Point
- DC Druid City
- JJ Johnson’s Joker
- Ice Ice House
- UD The Upside Down
- Mac Big Macadamia
- Byl Whale Sac
- BJ Big Juan
Hole installation sponsored by Druid City
You must go right of the Mando tree (marked ‘X’). If you miss the mando, add a penalty stroke and play from the drop zone in the middle of the fairway (level with the mando tree) ///object.bath.loss.
SPOTTERS:
Have a spotter in the first landing zone: on the right of the fairway, short of the mando tree.
If you’re going to the right of the first trees, be aware of people walking up the track.
As you progress down the fairway, keep moving spotters down ahead of the group – there’s a lot of places to lose a disc around here.
Seen from the tee, the restricted plane starts from the farthest left point of the tree’s main trunk and extends infinitely right (at 90deg from the basket) and infinitely upward.
Directions to next tee pad from this basket.
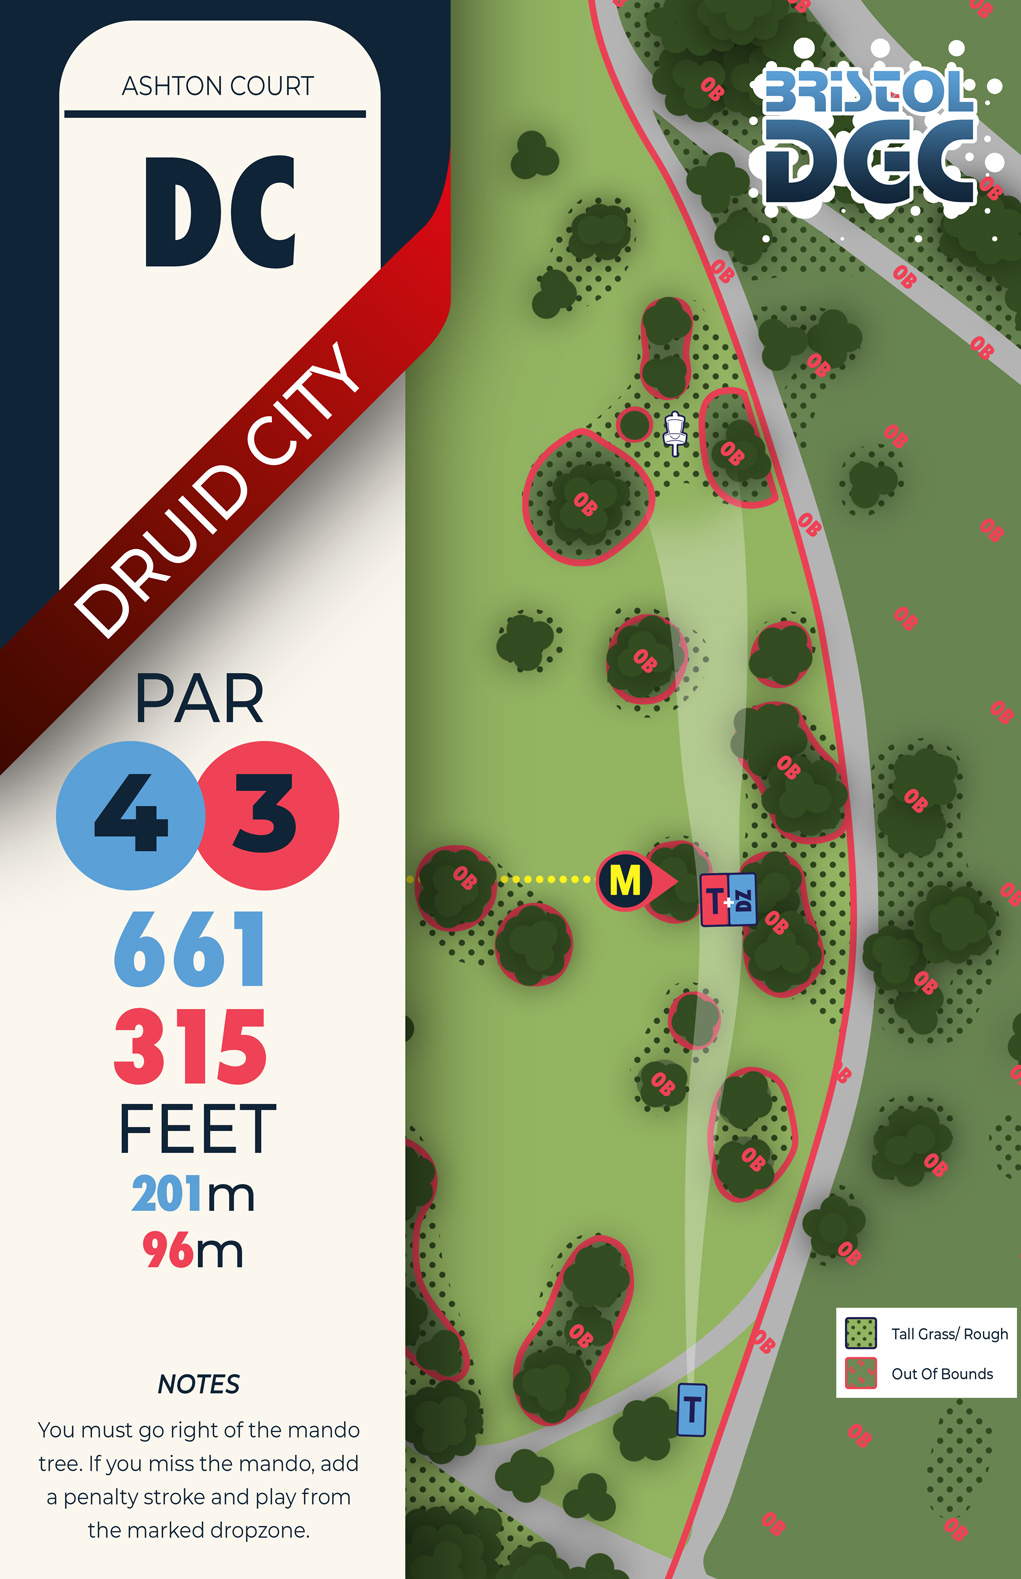 Posted areas, and the road are out of bounds.
The basket: